Chapter #20: Database Administration
In this article, you'll learn professional database administration: installing MySQL/MariaDB and PostgreSQL, automated backups with retention policies, and securing database servers with encryption and access controls.

In the previous chapter, we covered advanced networking such as setting up WireGuard VPNs, using SSH tunneling, and configuring Ubuntu as a router.
Now let's talk about database administration, which is all about managing where your applications store their data, such as website logins, online shopping, social media posts, and mobile apps, all of which rely on database queries running in the background.
Here's what you'll learn:
- Installing MySQL and MariaDB - getting the world's most popular database up and running.
- MySQL configuration and management - creating databases, users, and tables.
- Installing PostgreSQL - setting up the advanced open-source database.
- PostgreSQL administration - working with roles, schemas, and key features.
- Automated backup strategies - protecting your data with scheduled backups.
- Database security - hardening production servers with encryption and access controls.
By the end of this chapter, you'll be managing databases like a professional DBA (Database Administrator).
MySQL and MariaDB Installation
MySQL powers countless websites such as WordPress, Drupal, Joomla, and millions of custom applications.
MariaDB is a fork of MySQL created by its original developers, offering better performance and extra features while staying fully compatible.
Understanding MySQL vs MariaDB
Both databases use the same commands, syntax, and tools -they're like two branches of the same tree.
If you know how to work with one, you already know how to work with the other.
The main differences are under the hood: performance optimizations and which company maintains them.
MySQL:
- Originally developed by MySQL AB (now owned by Oracle).
- Industry standard with decades of production use.
- Huge ecosystem of tools and documentation.
- Works great across all platforms.
- Latest stable version: 9.5.0.
MariaDB:
- Created by MySQL's original founder (Michael "Monty" Widenius).
- Drop-in replacement for MySQL (100% compatible).
- Better performance in many cases (faster query optimizer).
- More storage engines available (Aria, ColumnStore).
- More open development process.
- The default database is in many Linux distributions.
- Latest stable version: 12.1.2.
Which Should You Choose?
For most purposes, they work the same way, and Ubuntu's default repositories include both, and we'll use MariaDB since it's the modern choice with better performance and active development, but everything you learn applies to MySQL too.
Installing MariaDB in Ubuntu
To install the latest version of MariaDB, first update your package lists, which will refresh Ubuntu's package information so you get the latest version available.
sudo apt update
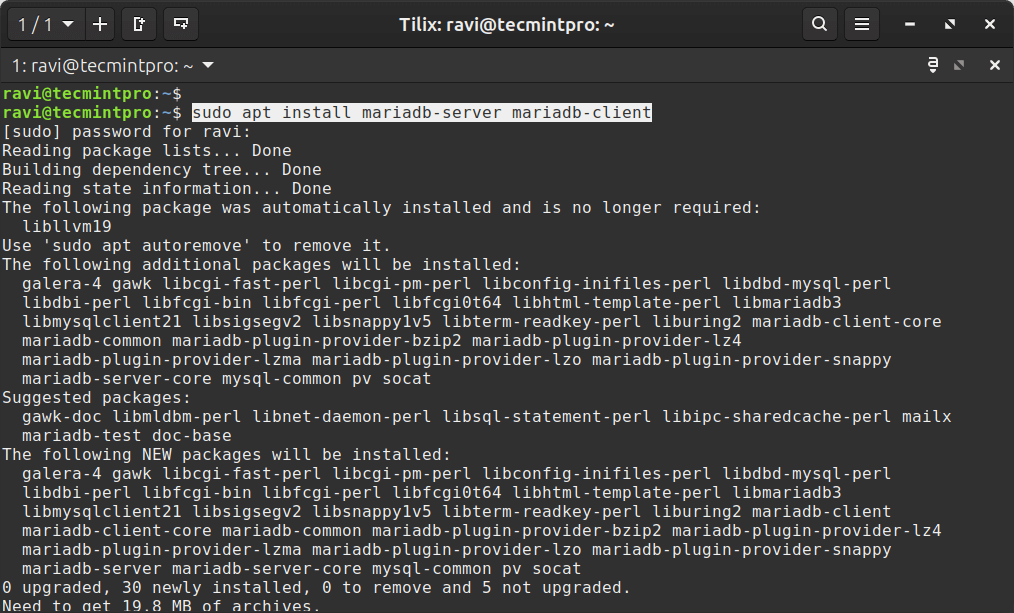
Once the package lists are updated, you can install the latest version of MariaDB.
sudo apt install mariadb-server mariadb-client
This single command does several things automatically:
- Installs the database software.
- Creates a system user called 'mysql' to run the service.
- Starts the MariaDB service.
- Enables it to start automatically when your server boots.
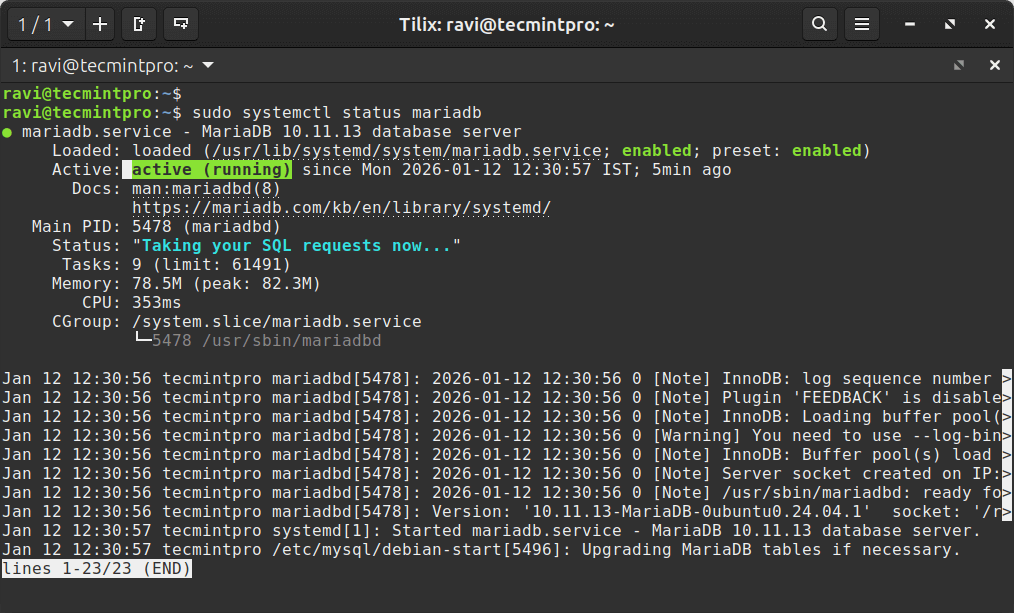
Once installed, verify the installation.
sudo systemctl status mariadb
Securing MariaDB Installation
The default installation has security vulnerabilities that need to be addressed immediately using the MariaDB security script, which guides you through hardening your database.
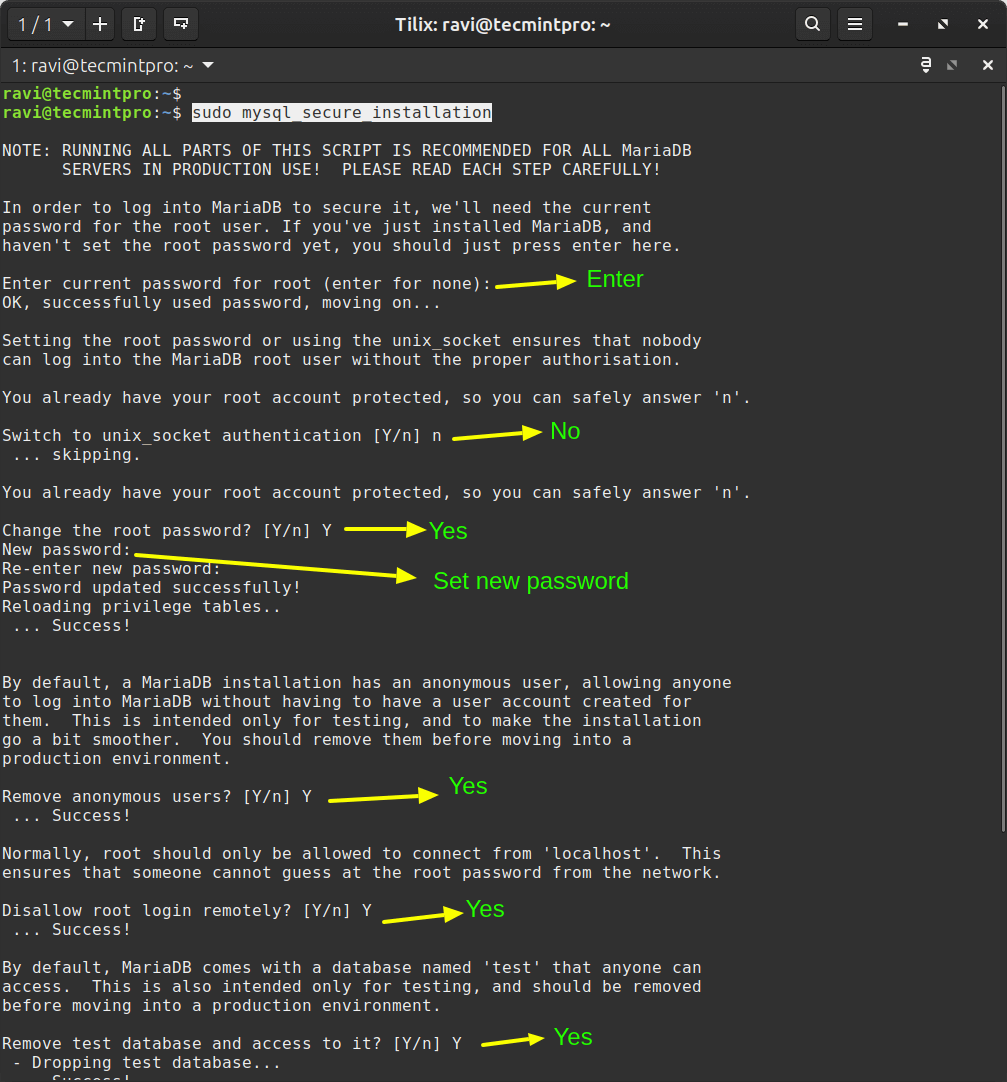
sudo mysql_secure_installation
The script will guide you through several prompts to enhance security:
- Prompt 1: Press Enter since no password is set yet on a fresh installation of MariaDB.
- Prompt 2: Choose "No" to use password authentication for more flexibility instead of restricting access to the system root only.
- Prompt 3: Choose "Yes" and create a strong password (16+ characters with mixed case, numbers, symbols) to protect database access.
- Prompt 4: Choose "Yes" to delete accounts without usernames that anyone can use to access your database.
- Prompt 5: Choose "Yes" to restrict root access to localhost only, preventing brute-force attacks from the internet.
- Prompt 6: Choose "Yes" to delete the publicly accessible test database that serves no production purpose.
- Prompt 7: Choose "Yes" to apply all security changes immediately by refreshing cached permissions.