Chapter 19: Advanced Networking Administration
In this chapter, you'll learn advanced networking skills, including setting up secure VPNs with WireGuard, mastering SSH tunneling techniques, and configuring Ubuntu as a home router with complete network control, including DHCP, DNS, and firewall management.

In the previous chapter, we covered storage management fundamentals such as selecting appropriate file systems, implementing LVM and RAID configurations, securing data with LUKS encryption, and automating storage operations through systemd and scripts.
Now we're going forward with the advanced networking skills that let you create secure connections across the internet, access remote systems safely, route traffic intelligently, and build your own network infrastructure from scratch.
Linux networking follows a layered, standards-based architecture where each component builds upon established protocols.
You're working with the same mature networking stack that powers enterprise infrastructure and cloud platforms, such as controlling packet flow, managing routing tables, and implementing security policies through proven tools and configuration methods.
These skills are essential for production environments: securing remote server access, establishing site-to-site connectivity, implementing network segmentation, or deploying custom routing solutions.
Understanding the underlying networking stack also provides critical insight into troubleshooting connectivity issues and optimizing network performance.
Here's what we'll cover:
- WireGuard VPN - modern, fast, secure VPN for all your devices.
- SSH Tunneling - secure access to remote services without VPN.
- Ubuntu as a Router - building your own network gateway.
- Network Monitoring - tracking bandwidth and connections.
By completing this chapter, you'll have the practical networking skills required to architect, deploy, and secure network infrastructure in professional Linux environments.
WireGuard VPN: The Modern Approach
WireGuard is a next-generation VPN that's faster, simpler, and more secure than older alternatives, as it uses state-of-the-art cryptography and has only 4,000 lines of code (compared to OpenVPN's 100,000+), making it easier to audit and more secure.
Think of WireGuard like a secure tunnel between devices, and each device has a key pair (like a lock and key), and they only talk to devices whose public keys they trust.
Installing WireGuard VPN
WireGuard is included in the mainline Linux kernel since version 5.6 and available in Ubuntu's default repositories.
sudo apt update
sudo apt install wireguard
wg --version
The wireguard package includes both the kernel module (if not already present) and userspace tools for key generation and interface management.
On modern Ubuntu releases (20.04+), the WireGuard kernel module is already integrated, so this primarily installs the configuration utilities.
After installation, verify kernel module availability:
# Check if WireGuard module is loaded
lsmod | grep wireguard

# If not loaded, it will load automatically when needed
# Or manually load it:
sudo modprobe wireguard

Configuring a WireGuard Server
Now, let’s configure a WireGuard VPN server to establish secure remote access to your network, using an example server located at 192.168.122.218 on the local network, which will be accessible remotely through WireGuard.
Step 1: Generate Cryptographic Keys
WireGuard uses Curve25519 for secure key exchange, which relies on a public/private key pair to authenticate peers and encrypt traffic.
To begin, generate a key pair for the server; the private key remains on the server and must be kept secret, while the public key is shared with client devices to establish trusted connections.
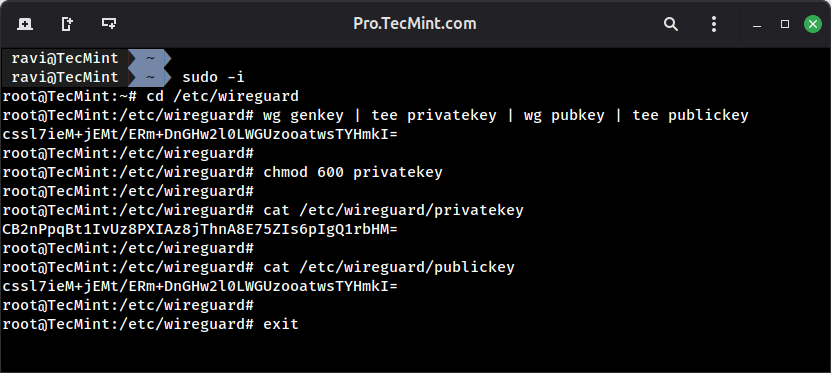
# Switch to root shell
sudo -i

# Navigate to WireGuard configuration directory
cd /etc/wireguard

# Generate key pair (private key piped to generate public key)
wg genkey | tee privatekey | wg pubkey | tee publickey

# Restrict private key permissions
chmod 600 privatekey

# Display keys for configuration
cat privatekey  # Server private key - protect this
cat publickey   # Server public key - distribute to peers

# Exit root shell when done
exit