Chapter #9: Networking in Ubuntu
In this chapter, you'll learn how to configure network connections, troubleshoot connectivity issues, share files between computers, and implement essential security practices to keep your Ubuntu system safe on local and internet networks.
In the last chapter, you learned how to move around the filesystem, run important commands, and even automate tasks to make your workflow easier in the Linux terminal.
Now it’s time to take things a step further by connecting your Ubuntu system to the network. Whether you’re joining your home Wi-Fi, setting up a wired connection at work, sharing files with other computers, or securing your system from unwanted access, networking is a key part of getting the most out of Ubuntu.
Modern computing is built around staying connected to the internet. Whether you’re browsing the web, downloading updates, using cloud storage, sharing files, or connecting to remote machines, you need a working network to get things done, and Ubuntu makes this easy by letting you manage your network through a graphical interface or directly from the terminal.
In this chapter, you’ll learn how to:
- Set up and configure wired and wireless network connections.
- Diagnose and fix common connectivity issues.
- Share files between computers on a network.
- Understand basic network security and protect your system.
- Connect to other machines remotely in a secure way.
By the time you’re done with this chapter, you’ll feel confident managing network connections and keeping your Ubuntu system running smoothly and securely.
Understanding Network Basics
Before we start configuring anything, let's first understand some networking basics to help familiarize ourselves with a few core networking concepts.
IP Addresses
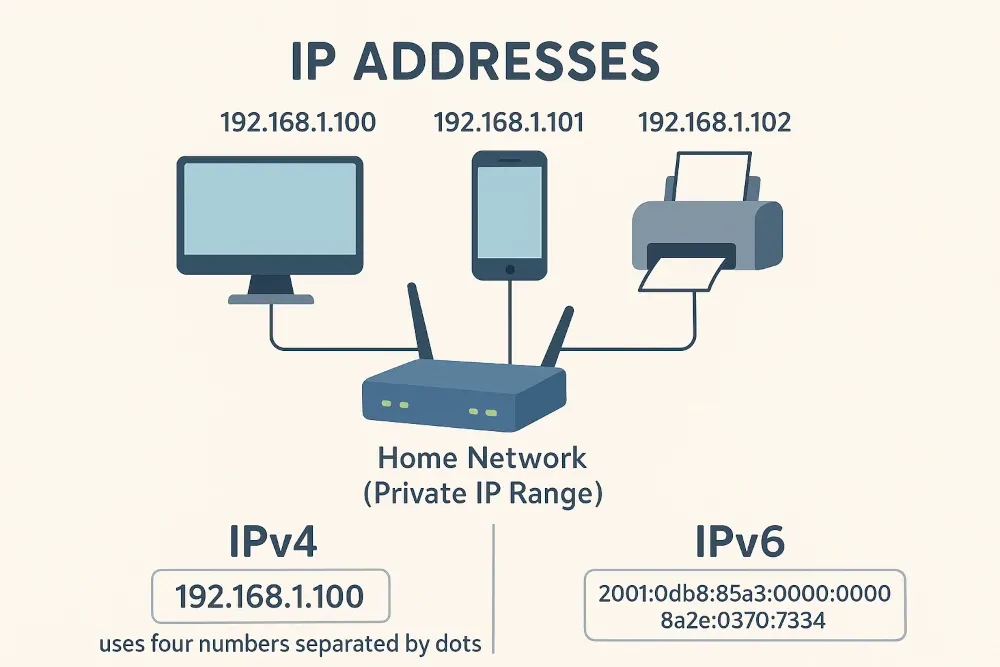
Every device on a network needs an IP address, which serves as its unique identifier. Think of it like a street address for your computer.
Most of the time, you’ll see IPv4 addresses, which look like this:
192.168.1.100
They’re made up of four numbers (each between 0 and 255) separated by dots, and most home and office networks usually use private IP ranges such as:
192.168.0.0 to 192.168.255.255
172.16.0.0 to 172.31.255.255
10.0.0.0 to 10.255.255.255
There’s also IPv6, which uses longer addresses, like this:
2001:0db8:85a3:0000:0000:8a2e:0370:7334
IPv6 was introduced because the number of available IPv4 addresses was running out, as more devices connected to the internet, so we needed a newer system with many more possible addresses.
IPv6 is now being used more on modern networks, but we’ll focus on IPv4 for now because it’s still the most widely used and easiest to understand.
DHCP vs Static IP
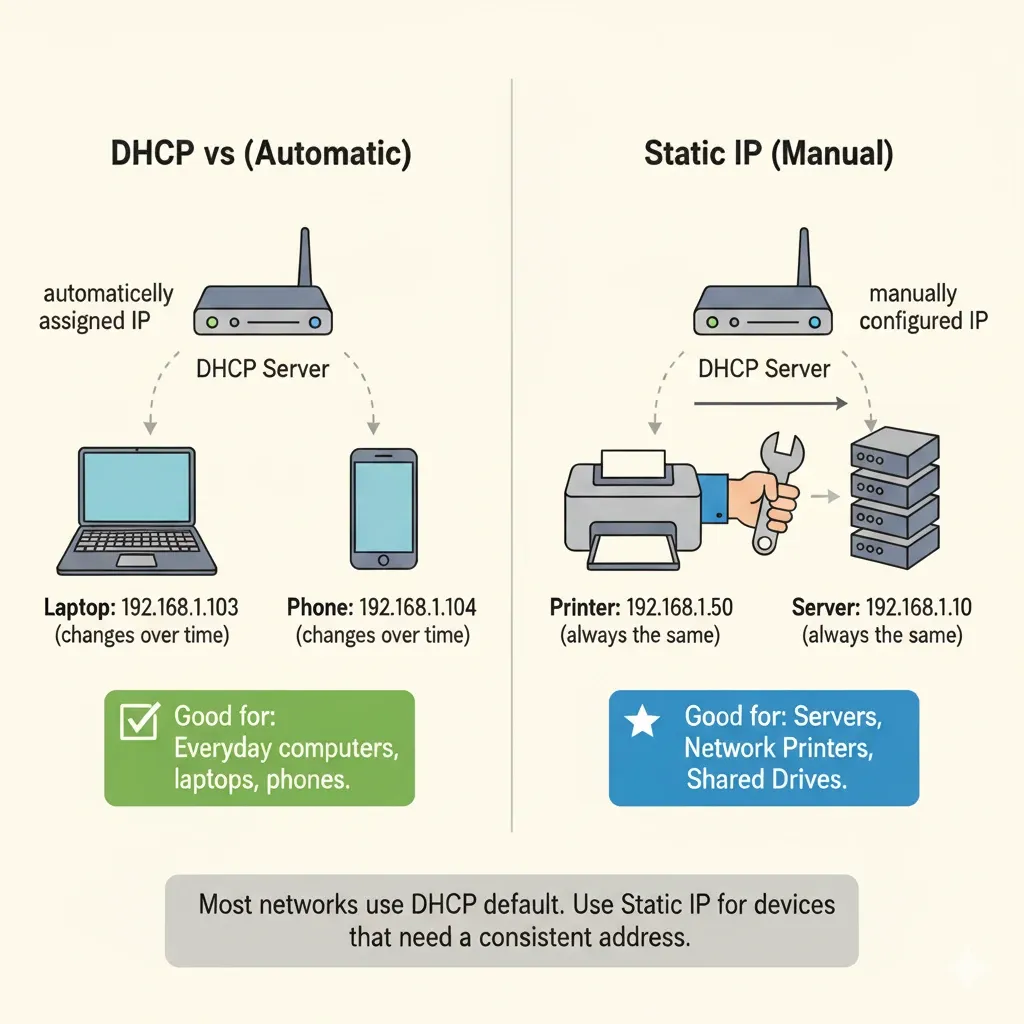
When a device connects to a network, it needs an IP address, so instead of asking you to assign one manually every time, most networks use DHCP (Dynamic Host Configuration Protocol), where your router usually acts as the DHCP server and automatically assign IP addresses to devices as they join the network, which the default setup in most homes and workplaces because it just works without any extra configuration.
On the other hand, a Static IP is an address that doesn’t change, and you need to assign it manually and keep it fixed, which is useful when you need to reliably reach a device on your network every time, for example, a server you host, a network printer, or a machine you regularly SSH into.
- Use DHCP for everyday computers, laptops, and phones.
- Use Static IP for servers, routers, shared drives, or systems that need a consistent address.