Chapter 19: Improving Linux Network Security
In this chapter, you'll learn how to harden SSH configuration, block brute-force attacks with fail2ban, write advanced firewall rules, and monitor network activity on a Linux server.
In Chapter 18 of the LFCA Certification Course, you learned how to secure data at the filesystem level using file permissions, special permission bits, GPG and LUKS encryption, immutable files with the chattr command, and default permissions with umask, and Access Control Lists (ACLs).
This chapter closes Module 4: Security Fundamentals by moving from the filesystem to the network, covering the controls that protect a Linux server from attack over the network: tightening SSH configuration beyond the basics from Chapter 17, blocking brute-force attempts automatically with fail2ban writing more specific firewall rules, scanning your own server with the nmap command to see what attackers see, and monitoring for suspicious network activity.
Every command in this chapter was tested on Ubuntu 26.04 LTS, but they work on any modern Linux distribution, including Debian, Fedora, Rocky Linux, and RHEL, with distro-specific variants labeled throughout.
Harden SSH Configuration Further
In Chapter 17, you learned the three most important SSH security improvements:
- Disable root login
- Use SSH key authentication instead of passwords
- Change the default SSH port

In this section, we'll look at a few additional sshd_config settings that can further reduce your server's exposure to attacks.
Most SSH settings are configured in the /etc/ssh/sshd_config file. After making any changes, restart the SSH service for them to take effect:
sudo nano /etc/ssh/sshd_config
sudo systemctl restart sshd
Limit Which Users Can Log In via SSH
By default, any valid user account on the system can attempt an SSH login. A more secure approach is to allow SSH access only to specific users.
To allow only certain users:
AllowUsers <user1> <user2>
Replace <user1> and <user2> with the actual usernames that should be able to connect via SSH.
You can also allow access based on group membership or restrict it to a specific group:
AllowGroups sshusers
With AllowUsers enabled, any account not listed is blocked from SSH access, even if it has a valid password or SSH key.
This is a simple way to prevent service accounts, temporary users, or newly created accounts from being accessible over SSH by mistake.
Limit Authentication Attempts
The MaxAuthTries setting controls how many login attempts a user can make before the SSH server closes the connection.
The default value is usually 6, which gives an attacker enough tries to test several passwords:
MaxAuthTries 3
Reducing this value gives attackers fewer opportunities to guess passwords or try multiple authentication methods.
If you're already using SSH keys, legitimate users typically authenticate on the first attempt, so lowering this limit usually causes no inconvenience.
Automatically Disconnect Idle Sessions
Leaving an SSH session open on an unattended computer can be a security risk. If someone gains access to that device, they may be able to use the active session.
You can configure SSH to automatically disconnect inactive sessions:
ClientAliveInterval 300
ClientAliveCountMax 2
Here's how these settings work:
ClientAliveInterval 300sends a check every 300 seconds (5 minutes).ClientAliveCountMax 2allows two missed responses before disconnecting the session.
In practice, an inactive session will be closed after about 10 minutes.
ClientAliveInterval 300 sends a keepalive check every 300 seconds (5 minutes), and ClientAliveCountMax 2 means if 2 consecutive checks go unanswered, the session is terminated, so an idle session times out after about 10 minutes.
Disable Protocol Features You Don't Need
Some SSH features are useful in specific situations but unnecessary on many servers.
To disable them:
X11Forwarding no
AllowTcpForwarding no
PermitTunnel no
These settings do the following:
X11Forwarding nodisables running graphical applications over SSH.AllowTcpForwarding nodisables SSH tunneling and port forwarding.PermitTunnel nodisables network tunnel devices.
Most Linux servers don't need these features, so disabling them reduces the number of ways SSH can be used.
Before disabling TCP forwarding, make sure the server isn't being used for SSH tunnels, port forwarding, VPN-style connections, or other applications that depend on this feature.
Setting:
AllowTcpForwarding noOn a server that relies on SSH tunneling can cause applications or services to stop working unexpectedly.
Always verify the server's role before disabling forwarding features.
A Complete Hardened SSH Configuration
The settings you've learned in Chapter 17 and this chapter can be combined into a practical SSH hardening configuration suitable for most production servers:
Port 2222
PermitRootLogin no
PasswordAuthentication no
PubkeyAuthentication yes
MaxAuthTries 3
AllowUsers tecmint ravi
ClientAliveInterval 300
ClientAliveCountMax 2
X11Forwarding no
AllowTcpForwarding no
PermitTunnel no
This configuration:
- Moves SSH away from the default port.
- Prevents direct root logins.
- Requires SSH key authentication.
- Limits login attempts.
- Restricts SSH access to specific users.
- Automatically disconnects idle sessions.
- Disables SSH features that are not needed on most servers.
While no configuration makes a server completely immune to attack, these settings significantly reduce the most common SSH-related risks.
sshd_config directive end to end with hands-on examples built for sysadmins rather than developers.Block Brute-Force Attacks with fail2ban
Even after securing SSH, your server will still receive constant connection attempts from automated scanners searching for vulnerable systems.
If password authentication is enabled for any users, brute-force attacks become an even bigger concern.
Even with key-only authentication enabled, automated scanners still hit port 22 (or your custom SSH port) constantly and fill authentication logs with noise, and on servers where password authentication is still needed for some users, brute-force attacks are a real threat.
fail2ban helps by monitoring authentication logs and automatically blocking IP addresses that repeatedly fail to log in.
Common uses include protecting:
- SSH
- Web application login pages
- FTP servers
- Mail servers
- Any service that records authentication failures in logs
When an IP exceeds a defined number of failed attempts, fail2ban adds a temporary firewall rule to block that address.
fail2ban monitors log files for repeated failed authentication attempts and automatically adds temporary firewall rules to block the offending IP address, and it works across SSH, web server login forms, FTP, and any other service that logs authentication failures.
Install fail2ban
On Ubuntu and Debian:
sudo apt install fail2ban
On RHEL, Rocky Linux and similar distributions:
sudo dnf install epel-release
sudo dnf install fail2ban
Enable and start the service:
sudo systemctl enable fail2ban --now
Verify that it is running:
sudo systemctl status fail2ban
Configure a fail2ban Jail
A jail defines what service fail2ban monitors and how it responds to suspicious activity.
Each jail specifies:
- Which logs to watch
- What counts as a failed attempt
- How many failures are allowed
- How long should an IP remain blocked
The default configuration file is:
/etc/fail2ban/jail.confHowever, you should never edit this file directly because package updates can overwrite it.
Instead, create a local configuration file:
sudo nano /etc/fail2ban/jail.local
Add the following configuration:
[DEFAULT]
bantime  = 3600
findtime = 600
maxretry = 5
backend  = systemd

[sshd]
enabled  = true
port     = 2222
logpath  = %(sshd_log)s
maxretry = 3
Here's what each setting does:
bantime = 3600- Ban the IP for 1 hour (3600 seconds).findtime = 600- Count failed attempts within a 10-minute window.maxretry = 5- Ban after 5 failures during the defined window.backend = systemd- Read authentication events from the systemd journal.enabled = true- Enable protection for SSH.port = 2222- Monitor the custom SSH port configured earlier.maxretry = 3- Override the global setting and ban SSH attackers after 3 failed attempts.
The backend = systemd option is recommended on Ubuntu 26.04 and most modern Linux distributions that use systemd.
After saving the file, restart fail2ban:
sudo systemctl restart fail2ban
Check fail2ban Status
To see which jails are active:
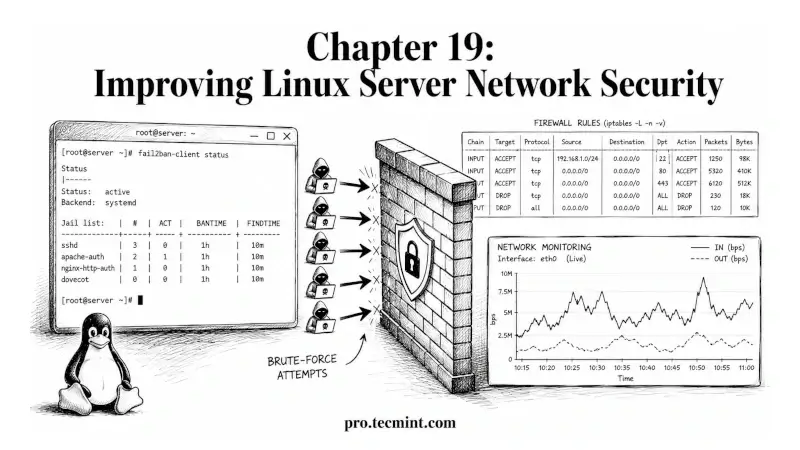
sudo fail2ban-client status
Output:
Status
|- Number of jail:	1
`- Jail list:	sshd
To view detailed information about the SSH jail:
sudo fail2ban-client status sshd
Output:
Status for the jail: sshd
|- Filter
|  |- Currently failed:	2
|  |- Total failed:	47
|  `- File list:	/var/log/auth.log
|- Actions
   |- Currently banned:	1
   |- Total banned:	8
   `- Banned IP list:	203.0.113.45
Understanding the Output
- Currently failed: 2 - Two recent failed login attempts have been detected.
- Total failed: 47 - Forty-seven authentication failures have been recorded since the jail started.
- Currently banned: 1 - One IP address is currently blocked.
- Total banned: 8 - Eight IP addresses have been banned since fail2ban started monitoring.
- Banned IP list - Shows the IP addresses that are currently blocked.
Seeing failed login attempts on a public-facing server is completely normal. In fact, many servers begin receiving automated login attempts within minutes of being connected to the internet.
The real value of fail2ban is that it automatically responds to those attacks by blocking abusive IP addresses before they can continue hammering your authentication services.
Unban an IP Address
Occasionally, a legitimate user may get blocked by fail2ban. This can happen if:
- They repeatedly enter the wrong password.
- Their SSH key is misconfigured.
- Their IP address changes after reconnecting to a network.
- You accidentally lock yourself out while testing SSH settings.
To remove a banned IP address manually, use:
sudo fail2ban-client set sshd unbanip <ip-address>Replace <ip-address> with the IP address you want to unblock.
For example:
sudo fail2ban-client set sshd unbanip 203.0.113.45After running the command, the IP address is immediately removed from the fail2ban ban list and can connect again.
View Currently Banned IPs
Before unbanning an address, you can check which IPs are currently blocked:
sudo fail2ban-client status sshdLook for the Banned IP list section in the output:
Banned IP list: 203.0.113.45 198.51.100.12Exam Tip
For the LFCA exam, remember the basic fail2ban workflow:
- Install and enable fail2ban.
- Create a jail to monitor a service such as SSH.
- Configure values like
bantime,findtime, andmaxretry. - Check status with
fail2ban-client status. - Unban an address with:
sudo fail2ban-client set sshd unbanip <ip-address>In real-world environments, fail2ban often reveals just how many automated login attempts are hitting an internet-facing server. Even a newly deployed server can start receiving SSH login probes within minutes of being exposed to the public internet.
fail2ban setup and monitoring for brute-force activity are things you want to tie into a broader security monitoring picture, share this chapter with a sysadmin who's running password-authenticated SSH on a public IP and hasn't checked their auth logs recently, because the number of failed attempts is almost always higher than they expect.Write More Specific Firewall Rules
In Chapter 17, you learned how to enable ufw and firewalld and allow traffic on specific ports.
In practice, simply opening a port is often not enough. A more secure approach is to control who can access a service, limit excessive connection attempts, and monitor blocked traffic for signs of suspicious activity.
Restrict Access to a Port by Source IP
Instead of allowing a service to be accessed from anywhere on the internet, restrict it to trusted IP addresses or networks.
This is especially useful for:
- SSH access
- Admin dashboards
- Database servers
- Internal management services
Using UFW on Ubuntu/Debian - To allow access only from a specific IP address:
On Ubuntu/Debian with ufw, replacing <trusted-ip> with the IP or CIDR range that should have access:
sudo ufw allow from <trusted-ip> to any port 2222
For example, to allow SSH only from the 192.168.1.0/24 network:
sudo ufw allow from 192.168.1.0/24 to any port 2222
This means:
- Devices within the
192.168.1.0/24subnet can connect. - Everyone else is blocked.
Restricting access by source IP dramatically reduces your attack surface because the service is no longer exposed to the entire internet.
Using firewalld - On Rocky Linux, RHEL, and other firewalld-based systems, use a rich rule:
sudo firewall-cmd --permanent --add-rich-rule='rule family="ipv4" source address="<trusted-ip>" service name="ssh" accept'
sudo firewall-cmd --reload
Replace <trusted-ip> with the IP address or CIDR range you want to allow.
Rate-Limit Connection Attempts
Even if a service is publicly accessible, you can limit how quickly a client can make new connections. This helps reduce the effectiveness of brute-force attacks.
Using UFW for systems using the default SSH port:
sudo ufw limit ssh
The limit action temporarily blocks an IP address if it creates too many connection attempts within a short period. This provides basic protection without requiring additional software.
Custom SSH Ports - A common mistake is forgetting that:
sudo ufw limit sshOnly applies to the standard SSH port (22). If you've changed SSH to port 2222, use:
sudo ufw limit 2222/tcpOtherwise, the rate-limiting rule will not protect your custom SSH service.
allow and limit. allow permits traffic, while limit permits traffic but automatically throttles excessive connection attempts.Log Denied Traffic
Firewall logs can help you identify scans, brute-force attacks, and other unwanted activity.
UFW supports several logging levels. To enable more detailed logging:
sudo ufw logging medium
To watch firewall events in real time:
sudo journalctl -f | grep UFW
Output:
May 08 15:42:31 tecmint-server kernel: [UFW BLOCK] IN=eth0 OUT= SRC=203.0.113.45 DST=192.168.1.101 PROTO=TCP DPT=2222
May 08 15:42:32 tecmint-server kernel: [UFW BLOCK] IN=eth0 OUT= SRC=203.0.113.45 DST=192.168.1.101 PROTO=TCP DPT=2222
May 08 15:42:33 tecmint-server kernel: [UFW BLOCK] IN=eth0 OUT= SRC=203.0.113.45 DST=192.168.1.101 PROTO=TCP DPT=2222
Let's break down one line:
SRC=203.0.113.45The source IP attempting to connect.
DPT=2222The destination port is being targeted.
[UFW BLOCK]The firewall denied the connection.
In this example, the same IP address repeatedly attempts to connect to SSH on port 2222 and is blocked by the firewall.
Repeated connection attempts from a single IP are often a sign of automated scanning or brute-force activity.
Firewall Rules vs. fail2ban
Firewalls and fail2ban work well together:
| Tool | Purpose |
|---|---|
Firewall (ufw/firewalld ) |
Controls which traffic is allowed or denied. |
| fail2ban | Watches logs and automatically blocks IPs showing suspicious behavior. |
For example:
- An attacker repeatedly attempts SSH logins.
- SSH records the failed authentication attempts.
- fail2ban detects the failures.
- fail2ban adds a firewall rule to block the offending IP.
Together, these tools provide a strong first line of defense for internet-facing Linux servers.
iptables and nftables as the underlying firewall engines that ufw and firewalld sit on top of, the LFCS Certification Course covers both as part of the performance-based LFCS exam objectives, where you configure firewall rules directly on a live system.Scan Your Own Server with nmap
nmap command (Network Mapper) is one of the most widely used network scanning tools in Linux and cybersecurity.
It allows you to see which ports and services are reachable on a server from the network.
From a security perspective, scanning your own server is valuable because it shows exactly what an external user or a potential attacker can see when they connect to your system.
If a service is exposed to the internet, nmap will find it.
Install nmap
On Ubuntu and Debian:
sudo apt install nmap
On Rocky Linux, RHEL, and similar distributions:
sudo dnf install nmap
Verify the installation:
nmap --versionPerform a Basic Port Scan
To scan a server, run nmap from another machine and replace <server-ip> with your server's IP address:
nmap <server-ip>
Output:
Starting Nmap 7.94 ( https://nmap.org )
Nmap scan report for tecmint-server (192.168.1.101)
Host is up (0.00041s latency).
Not shown: 997 closed tcp ports (conn-refused)
PORT     STATE SERVICE
22/tcp   open  ssh
80/tcp   open  http
443/tcp  open  https

Nmap done: 1 IP address (1 host up) scanned in 0.42 seconds
Understanding the Results
| Port | Service | Meaning |
|---|---|---|
| 22/tcp | SSH | Remote administration access |
| 80/tcp | HTTP | Web traffic |
| 443/tcp | HTTPS | Secure web traffic |
This server has only three open ports, which is typical for a web server.
The most important question to ask is: "Do I expect every port listed here to be open?" If the answer is no, investigate immediately.
Unexpected open ports often indicate:
- Misconfigured services
- Software was installed by mistake
- Forgotten test applications
- Security risks
Detect Service Versions
A basic scan shows which ports are open.
Adding the -sV option tells nmap to identify the software running behind those ports:
nmap -sV <server-ip>
Output:
PORT     STATE SERVICE  VERSION
22/tcp   open  ssh      OpenSSH 9.6p1 Ubuntu 3ubuntu13 (Ubuntu Linux; protocol 2.0)
80/tcp   open  http     nginx 1.26.1
443/tcp  open  https    nginx 1.26.1
Why Version Detection Matters
Now we know not only that SSH and Nginx are running, but also which versions are installed. An attacker performing reconnaissance typically collects this information and compares it against known vulnerabilities.
For example:
- OpenSSH version
- Nginx version
- Apache version
- Database version
If outdated software contains a known vulnerability, it becomes a potential attack target.
This is one reason why keeping systems updated is such an important security practice.
nmap -sV performs service version detection and provides more detailed information than a standard scan.Scan All Ports
By default, nmap scans only the 1,000 most common TCP ports. While this covers most services, applications sometimes listen on unusual port numbers.
To scan all 65,535 TCP ports:
nmap -p- <server-ip>
The -p- option tells nmap to check every available port.
This scan takes longer than the default scan but provides a much more complete picture of the system.
A full-port scan can reveal:
- Custom application ports
- Development services
- Forgotten test environments
- Misconfigured software
Many administrators run a full scan periodically to verify that no unexpected services have been exposed.
Example Security Check - Suppose your server should only provide:
- SSH on port 2222
- HTTPS on port 443
You run:
nmap -p- <server-ip>And discover:
2222/tcp open ssh
443/tcp  open https
3306/tcp open mysql
The MySQL port was not intended to be public. Without the scan, you might never have realized that the database was exposed to the internet.
This is exactly why regularly scanning your own servers is considered a good security practice.
Common Mistake - Only scan systems that:
- You own
- You administer
- You have explicit permission to test
Network scanning is often treated as suspicious activity by organizations, hosting providers, and security monitoring systems.
Running scans against systems without authorization can trigger alerts, result in your IP being blocked, or lead to security investigations.
For the LFCA exam, remember that nmap is commonly used to:
- Discover open ports
- Identify running services
- Detect service versions
- Verify firewall rules
- Confirm what a server exposes to the network
Think of nmap as a way to view your server from an attacker's perspective before an attacker does.
nmap scanning, port enumeration, and understanding what attackers see during reconnaissance is a topic you want to go deeper on, share this chapter with a developer on your team who's deployed a Linux server but never looked at it from the outside, because the gap between what they think is open and what nmap actually shows is often surprising.Monitor Authentication Logs
Firewalls and fail2ban help protect a server, but it's equally important to understand what's actually happening on the system.
Authentication logs provide visibility into:
- Failed login attempts.
- Successful logins.
- Brute-force attacks.
- Unexpected user activity.
- Potential account compromise.
Monitoring these logs helps you detect suspicious behavior before it becomes a security incident.
Check Failed Login Attempts
Failed login attempts are often the first sign that someone is trying to access your server.
Ubuntu and Debian
On modern systemd-based systems, SSH authentication events can be viewed using journalctl:
sudo journalctl -u sshd --since "1 hour ago" | grep "Failed"
Output:
May 08 15:30:14 tecmint-server sshd[2341]: Failed password for invalid user admin from 203.0.113.45 port 52341 ssh2
May 08 15:30:15 tecmint-server sshd[2342]: Failed password for invalid user root from 203.0.113.45 port 52342 ssh2
May 08 15:30:16 tecmint-server sshd[2343]: Failed password for invalid user ubuntu from 203.0.113.45 port 52343 ssh2
Notice that:
- All attempts come from the same IP address.
- Multiple login attempts occur within seconds.
- Common usernames such as
admin,root, andubuntuare being tested.
This pattern is typical of an automated brute-force or credential-stuffing attack.
It's also exactly the type of behavior that fail2ban is designed to detect and block automatically.
On many Rocky Linux and RHEL-based systems, authentication events are stored in /var/log/secure:
To view recent failed logins:
sudo grep "Failed" /var/log/secure | tail -20
Check Successful Logins
Failed logins are important, but successful logins deserve just as much attention.
A valid login from an unexpected location could indicate:
- Stolen credentials
- A compromised SSH key
- Unauthorized access
- A legitimate user connecting from a new network
View successful SSH logins with:
sudo journalctl -u sshd --since "24 hours ago" | grep "Accepted"
Output:
May 08 14:21:04 tecmint-server sshd[1780]: Accepted publickey for tecmint from 192.168.1.45 port 52341 ssh2
May 08 14:28:11 tecmint-server sshd[1891]: Accepted publickey for ravi from 192.168.1.102 port 49211 ssh2
What Looks Normal? In this example:
- Both users authenticated with SSH keys.
- Both connections originated from the expected private network (
192.168.1.x).
This is a normal pattern.
What Would Be Suspicious? Examples worth investigating include:
- A login from an unfamiliar public IP.
- A login at an unusual time.
- A user account that rarely connects suddenly becoming active.
- A successful login using password authentication when your policy requires SSH keys.
A successful login isn't always a security problem, but unexpected activity should always be reviewed.
Use last and lastb
Earlier in the course, you learned about the last command for viewing login history. Linux also provides lastb, which displays failed login attempts.
sudo lastb | head -20
Output:
admin    ssh:notty    203.0.113.45     Thu May  8 15:30:14 - 15:30:14  (00:00)
root     ssh:notty    203.0.113.45     Thu May  8 15:30:15 - 15:30:15  (00:00)
ubuntu   ssh:notty    203.0.113.45     Thu May  8 15:30:16 - 15:30:16  (00:00)
test     ssh:notty    203.0.113.45     Thu May  8 15:30:17 - 15:30:17  (00:00)
The lastb command reads information from /var/log/btmp and provides a quick summary of failed authentication attempts.
Spotting a Brute-Force Attack - Suppose you run sudo lastb and see dozens or hundreds of entries from the same IP address within a short period. That's strong evidence of an active brute-force attack.
For example:
203.0.113.45
203.0.113.45
203.0.113.45
203.0.113.45
203.0.113.45
Repeated many times within a few minutes clearly indicates automated login attempts.
This information can help justify security controls such as:
- SSH key authentication
- fail2ban
- IP-based firewall restrictions
- VPN-only administrative access
Quick Security Investigation Workflow - When investigating suspicious SSH activity, a common workflow is:
- Check recent failed logins.
sudo journalctl -u sshd --since "1 hour ago" | grep "Failed"- Review successful logins.
sudo journalctl -u sshd --since "24 hours ago" | grep "Accepted"- Check fail2ban status.
sudo fail2ban-client status sshd- Review firewall logs.
sudo journalctl -f | grep UFW- Review historical failed logins.
sudo lastbTogether, these tools provide a clear picture of who is attempting to access your server, whether those attempts are succeeding, and how your security controls are responding.
Understand TCP Wrappers
TCP Wrappers is a legacy access control mechanism that was widely used before modern firewall tools such as ufw, firewalld, and nftables became standard.
Although it is rarely used today, it still appears in Linux certification exams, including the LFCA, so it's important to understand how it works.
TCP Wrappers controls access to supported network services using two configuration files: /etc/hosts.allow and /etc/hosts.deny.
These files determine which hosts are allowed or denied access to a service.
How TCP Wrappers Processes Requests
When a connection request arrives, TCP Wrappers evaluates the rules in the following order:
Step 1: Check /etc/hosts.allow if a matching rule is found:
- The connection is allowed.
- No further checks are performed.
Step 2: Check /etc/hosts.deny if no rule matched in hosts.allow, TCP Wrappers checks hosts.deny.
If a matching rule is found:
- The connection is denied.
Step 3: No Match Found if neither file contains a matching rule:
- The connection is allowed.
This behavior is known as default allow.
hosts.allow → hosts.deny → allow by default.Configure TCP Wrappers
Suppose you want to allow SSH access only from a trusted subnet.
Edit etc/hosts.allow
sudo nano /etc/hosts.allow
Add:
sshd: <trusted-subnet>
Example:
sshd: 192.168.1.or
sshd: 192.168.1.0/24Edit /etc/hosts.deny
sudo nano /etc/hosts.deny
Add:
sshd: ALL
This configuration means:
- Connections from the trusted subnet are allowed.
- All other SSH connections are denied.
How the Rules Work Together
Consider a configuration where /etc/hosts.allow contains sshd: 192.168.1.0/24 and /etc/hosts.deny contains sshd: ALL.
When a client attempts to connect to the SSH service, TCP Wrappers first checks the hosts.allow file. Any host with an IP address in the 192.168.1.0/24 subnet, such as 192.168.1.50 or 192.168.1.100, matches the allow rule and is granted access immediately.
Connections from other IP addresses, such as 203.0.113.45 or 198.51.100.20, do not match the allow rule, so TCP Wrappers continues to checkhosts.deny, where the sshd: ALL rule blocks them.
As a result, only systems within the trusted subnet can connect via SSH, while all other hosts are denied access.
Common Mistake - A classic mistake is adding: ALL: ALL to /etc/hosts.deny before creating the necessary allow rules.
For example:
ALL: ALLWithout a matching entry in hosts.allow can block access to every TCP-wrapped service on the system.
To avoid accidentally locking yourself out:
- Create and verify the required rules in
hosts.allow. - Test access from an authorized system.
- Only then add broad deny rules.
Whenever possible, keep an active console session open while testing access controls so you can recover if something goes wrong.
libwrap support, and most modern services on current Linux distributions are NOT compiled with libwrap, which means TCP wrapper rules silently have no effect on them, so ufw or firewalld rules are more reliable for access control on modern systems, and TCP wrappers should be treated as a legacy mechanism rather than a primary security control.TCP Wrappers vs Modern Firewalls
| Feature | TCP Wrappers | Modern Firewalls |
|---|---|---|
| Controls access by IP | Yes | Yes |
| Works for all network services | No | Yes |
| Requires application support | Yes | No |
| Still widely used today | No | Yes |
| Recommended for new deployments | No | Yes |
Today, administrators typically use:
ufwon Ubuntu and Debianfirewalldon Rocky Linux, RHEL, and Fedoranftableson modern Linux systems
These tools operate at the network layer and do not depend on application support.
Check for Listening Services You Don't Recognize
A good security habit is to regularly review the network services running on your server and verify that every open port is expected. This builds on the ss command you learned in Chapter 4 and the network troubleshooting techniques covered in Chapter 12.
To view all listening TCP and UDP ports along with the processes using them, run:
sudo ss -tulnp
Output:
Netid  State   Recv-Q  Send-Q  Local Address:Port  Peer Address:Port Process
tcp    LISTEN  0       128     0.0.0.0:2222         0.0.0.0:*         users:(("sshd",pid=472))
tcp    LISTEN  0       511     0.0.0.0:80            0.0.0.0:*         users:(("nginx",pid=891))
tcp    LISTEN  0       128     0.0.0.0:443           0.0.0.0:*         users:(("nginx",pid=891))
In this example, the server is listening on only three ports:
- 2222 for SSH (
sshd) - 80 for HTTP (
nginx) - 443 for HTTPS (
nginx)
This matches the results from the earlier nmap scan, which is exactly what you want. The internal view (ss) and external view (nmap) agree, confirming that only the expected services are exposed and that no unexpected ports are accessible from the network.
If you see a listening port that you don't recognize, identify the process associated with it:
sudo ss -tulnp | grep <port-number>
For example, to investigate port 3306:
sudo ss -tulnp | grep 3306The output will show which service owns the port and its process ID. Once you've identified the application, determine whether it should be running on the system.
If the service is unnecessary, disable and stop it. If the software was installed accidentally or without authorization, consider removing the package entirely.
Module 4 Closes Here
With Chapter 19 complete, you've finished Module 4: Security Fundamentals, covering the entire Security Fundamentals domain (14%) of the LFCA exam across three chapters:
- Chapter 17: Foundational security practices, system updates, firewalls, and SSH basics.
- Chapter 18: File permissions, special permission bits, encryption, immutable files,
umask, and ACLs. - Chapter 19: Network security controls, SSH hardening, fail2ban, advanced firewall rules, network scanning, authentication monitoring, and TCP Wrappers.
Together, these chapters provide the practical security knowledge needed to protect Linux systems at the operating system, filesystem, and network levels.
As you prepare for the LFCA exam, pay particular attention to the topics that appear most frequently in security-related questions:
- File permissions and numeric permission values.
- The differences between SUID, SGID, and the sticky bit.
- SSH hardening directives in
sshd_config. - Basic
fail2banconfiguration and status commands. - The distinction between encryption at rest and encryption in transit.
- Firewall concepts and common security troubleshooting scenarios.
A good final review strategy is to revisit the Quick Reference sections from Chapters 17, 18, and 19 and make sure you're comfortable recognizing the commands, configuration files, and use cases associated with each topic.
Next, you'll begin Module 5: DevOps Fundamentals with Chapter 20: Basic Concepts of DevOps. This module covers the DevOps domain (12%) of the LFCA exam and introduces the core ideas behind DevOps, including collaboration between development and operations teams, Continuous Integration and Continuous Delivery (CI/CD), version control with Git, and how these practices fit into the Linux environments you've been working with throughout this course.
Security is a critical part of modern Linux administration, but DevOps focuses on building, testing, deploying, and managing systems efficiently at scale.
The next module brings these concepts together and shows how Linux serves as the foundation for modern software delivery workflows.
Quick Reference: Commands in This Chapter
| Command | What It Does |
|---|---|
AllowUsers <user1> <user2> in sshd_config |
Restrict SSH login to named users only |
MaxAuthTries 3 in sshd_config |
Limit SSH authentication attempts per connection |
ClientAliveInterval 300 in sshd_config |
Send keepalive every 5 minutes |
ClientAliveCountMax 2 in sshd_config |
Disconnect after 2 missed keepalives (~10 min idle timeout) |
X11Forwarding no in sshd_config |
Disable X11 forwarding |
AllowTcpForwarding no in sshd_config |
Disable SSH tunneling |
sudo apt install fail2ban |
Install fail2ban on Ubuntu/Debian |
sudo dnf install fail2ban |
Install fail2ban on RHEL/Rocky Linux |
sudo systemctl enable fail2ban --now |
Start and enable fail2ban service |
sudo fail2ban-client status |
List active fail2ban jails |
sudo fail2ban-client status sshd |
Show SSH jail status and banned IPs |
sudo fail2ban-client set sshd unbanip <ip> |
Unban a specific IP address |
sudo ufw allow from <ip> to any port <port> |
Allow a port from a specific IP only |
sudo ufw limit 2222/tcp |
Rate-limit connections to a port |
sudo ufw logging medium |
Increase firewall logging detail |
sudo journalctl -f | grep UFW |
Watch live firewall block events |
nmap <server-ip> |
Scan open ports from an external perspective |
nmap -sV <server-ip> |
Scan open ports with service version detection |
nmap -p- <server-ip> |
Scan all 65,535 ports |
sudo journalctl -u sshd | grep "Failed" |
Show failed SSH login attempts |
sudo journalctl -u sshd | grep "Accepted" |
Show successful SSH logins |
sudo grep "Failed" /var/log/secure | tail -20 |
Show recent failed logins on RHEL/Rocky |
sudo lastb | head -20 |
Show recent failed login attempts from btmp log |
sudo ss -tulnp |
List all listening ports with owning process |
What's Next
Chapter 20: Basic Concepts of DevOps begins Module 5: DevOps Fundamentals, which covers the DevOps domain (12%) of the LFCA exam.
This chapter starts by looking beyond the DevOps buzzword and explains what DevOps actually means in real-world environments. You'll learn how development and operations teams work together, how the CI/CD pipeline helps automate software delivery, what Infrastructure as Code (IaC) looks like in practice, and how these concepts connect to the Linux systems you've been managing throughout this course.
The goal of this module is not to turn you into a software developer, but to help you understand the tools, workflows, and terminology that modern Linux administrators and cloud engineers encounter every day.
Before moving on, take some time to apply the concepts from this chapter to a Linux server you have access to. A few simple checks can quickly reveal whether a server is as secure as you think it is:
- Scan the server with
nmapfrom another system to see which ports are exposed. - Verify that
fail2banis installed, running, and actively monitoring SSH. - Review failed login attempts with
lastband look for signs of brute-force activity. - Run
sudo ss -tulnpto confirm that only expected services are listening for connections.
These checks provide a valuable reality check because they show the server's actual security posture rather than its intended configuration. In many cases, administrators discover unexpected services, forgotten test applications, or authentication activity they weren't aware of simply by performing these basic audits.
With Module 4 complete and your security foundation in place, you're ready to move into DevOps concepts and learn how Linux fits into modern software delivery and infrastructure automation workflows.
Some links in this course, including the LFCA exam link, are affiliate links. If you purchase through them, we earn a small commission at no extra cost to you. We only link to products we've used and genuinely recommend.