Chapter #8: Secure SSH Setup on Linux
Learn how to install, configure, and secure SSH on Linux. Set up remote access, use SSH keys, and transfer files with scp and sftp.
Now that you’ve got a solid grip on managing software packages with APT and YUM, it’s time to step into the world of networking - a must-have skill for any Linux user.
In this chapter, we’ll focus on essential network operations, especially around SSH (Secure Shell) - one of the most powerful tools in your Linux toolbox.
You’ll learn how to install and configure an SSH server, allowing you to connect to your Linux system remotely and securely. We'll also cover how to copy files across systems using tools that leverage SSH under the hood, like scp and rsync.
By the end of this chapter, you’ll be able to:
- Set up an SSH server to accept remote logins.
- Use SSH to log into your system from another computer.
- Transfer files securely between machines.
- Practice everything you’ve learned through hands-on exercises.
Let’s get started with making your Linux machine network-ready, safely and securely.
As a system administrator, you will often have to log on to remote systems to perform a variety of administration tasks using a terminal emulator.
You will rarely sit in front of a real (physical) terminal, so you need to set up a way to log on remotely to the machines that you will be asked to manage.
In fact, that may be the last thing that you will have to do in front of a physical terminal. For security reasons, using Telnet for this purpose is not a good idea, as all traffic goes through the wire in unencrypted, plain text. Instead, we will use SSH - a network protocol that provides a secure way to access a remote server.
Installing and Securing an SSH Server
For you to be able to log on remotely to a remote system using SSH, you will have to do:
yum update && yum install openssh openssh-server
or
aptitude install openssh-server
On some systems, especially older distributions, you might need to enable and start the SSH service manually after installation.
Use the following commands to do that:
systemctl enable sshd
systemctl start sshd
After installation, there are a couple of basic things that you need to take into account if you want to secure remote access to your SSH server.
The following settings should be present in the /etc/ssh/sshd_config file:
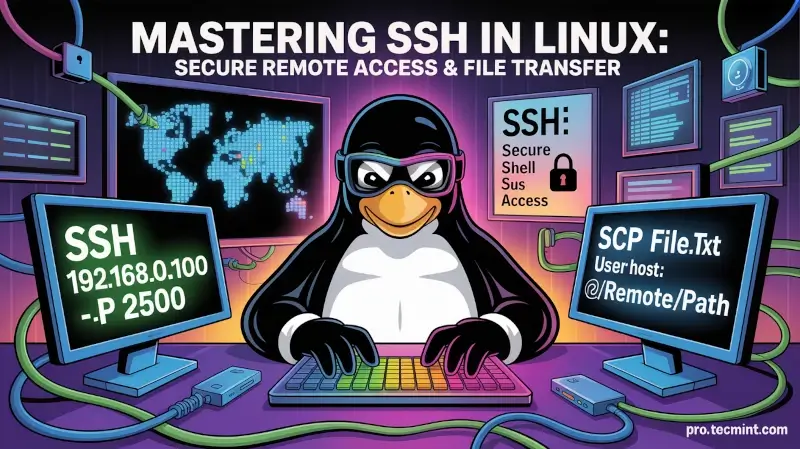
1. Change the Default SSH Port
Change the port where the sshd daemon will listen from 22 (the default value) to a high port (~2000 or greater). But first, make sure the chosen port is not being used.
For example, let’s suppose you choose port 2500. Use netstat (a tool included in the net-tools package in CentOS, and available out of the box in Debian and derivatives) to check whether the chosen port is being used:
netstat -npltu | grep 2500
Tip: If netstat isn’t installed, you can use ss, a modern replacement for checking ports:
ss -npltu | grep 2500
If the above command does not return anything, you can safely use port 2500 for sshd, and you should change the Port setting in the configuration file as follows:
Port 2500
2. Enforce SSH Protocol 2 Only
SSH supports two protocol versions: Protocol 1 and Protocol 2.
Protocol 1 is obsolete, insecure, and vulnerable to several types of attacks such as man-in-the-middle and packet injection. It lacks strong encryption and should never be used.
By explicitly setting Protocol 2 in your SSH configuration, you're ensuring that only the secure, modern version of SSH is allowed.
Most systems use Protocol 2 by default now, but it's still good practice to explicitly enforce it in the config file to eliminate any chance of fallback to Protocol 1.
Protocol 2
3. Harden Authentication Settings
Configure the authentication timeout to 2 minutes, do not allow root logins, and restrict to a minimum the list of users who are allowed to login via ssh:
LoginGraceTime 2m
PermitRootLogin no
AllowUsers gacanepa
gacanepa with your actual system username(s). You can specify multiple users like so: AllowUsers user1 user2These changes reduce the attack surface by:
- Preventing brute-force login attempts against the root user
- Giving you time-based protection against hanging or idle login sessions
- Restricting access to known users only
4. Use Key-Based Authentication and Disable Password Logins
If possible, use key-based and disable password authentication:
PasswordAuthentication no
RSAAuthentication yes
PubkeyAuthentication yes
Instead of typing a password every time you log in, you can use SSH keys, which are much more secure and convenient. SSH keys come in pairs - one public (shared with the server) and one private (kept secret on your computer).
PasswordAuthentication no: This disables password login to prevent brute-force attacks.RSAAuthentication yes: This enables RSA-based key authentication (a popular SSH key type).PubkeyAuthentication yes: This allows login using public/private key pairs.
Using SSH keys makes your server harder to hack and easier for you to access - just don’t lose your private key!
Before this, you will need to create a pair of private and public keys and copy the public one from your local machine to the server.