Chapter #17: How to Configure and Manage Basic Networking
In this guide, you’ll learn how to manage RHEL networking, from configuring IPv4/IPv6 and setting hostnames to managing services and firewalld rules.
Configuration and management of networking services is an essential skill that every Linux user and system administrator needs to have at their fingertips.
In this guide, we examine how to configure and manage networking in RHEL with respect to the following key aspects:
- Configuration of IPv4 and IPv6 addressing
- Setting up hostname
- Configuration of network services to start automatically at boot
- Restriction of network access using firewall-cmd/firewall
Configure IPv4 and IPv6 Addressing
The traditional way of managing IPv4 addressing is through manual configuration of the /etc/sysconfig/network-scripts directory. However, this is no longer the preferred way of configuring an IPv4 address. With RHEL, two command-line tools come in handy, and they are:
nmclinmtui
Configure IPv4 Using the nmcli Tool
Abbreviated as nmcli, the network manager command line interface is a nifty and easy-to-use tool that saves you lots of time when you need to configure an IP address.
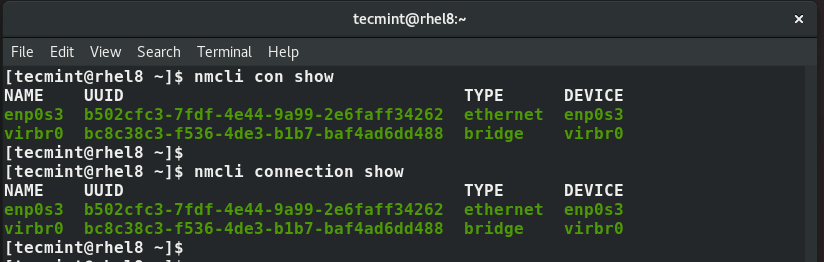
To display all the active network interfaces on your RHEL system, execute the command:
nmcli connection show
OR
nmcli con show
Note that con is the truncated form of connection and you will still end up with the same result as shown.
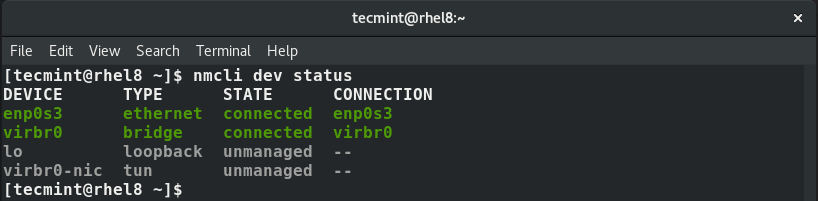
Also, you can run the command below to display both active and inactive interfaces.
nmcli dev status
Using the nmcli tool, you can modify a network interface to use a static IP address. In this example, we will modify the network interface enps03 to use a static IP.
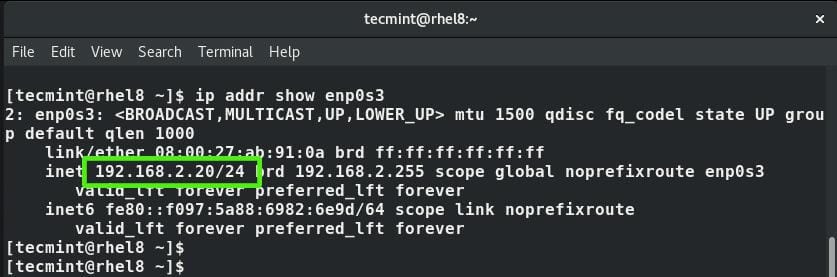
But first, let’s check the IP address using the IP command.
ip addr
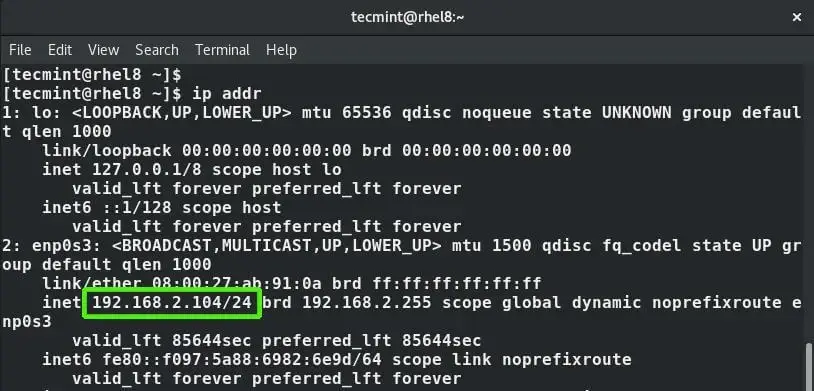
The current IP address is 192.168.2.104 with a CIDR of /24. We are going to configure a static IP with the following values:
IP address:      192.168.2.20/24
Default gateway: 192.168.2.1
Preferred DNS:   8.8.8.8
IP addressing:   static
First, run the command below to set up the IP address:
nmcli con mod enps03 ipv4.addresses 192.168.2.20/24
Next, configure the default gateway as shown:
nmcli con mod enps03 ipv4.gateway 192.168.2.1
Then set up the DNS server:
nmcli con mod enps03 ipv4.dns “8.8.8.8”
Next, change the addressing from DHCP to static:
nmcli con mod enps03 ipv4.method manual
To save the changes, run the command:
nmcli con up enps03

The changes will be written to /etc/network-scripts/ifcfg-enps03 file. To confirm the IP, once again run the command:
ip addr enps03
Additionally, you can view the /etc/network-scripts/ifcfg-enps03 file using cat command:
cat /etc/network-scripts/ifcfg-enps03

Configure IPv4 Using the nmtui Tool
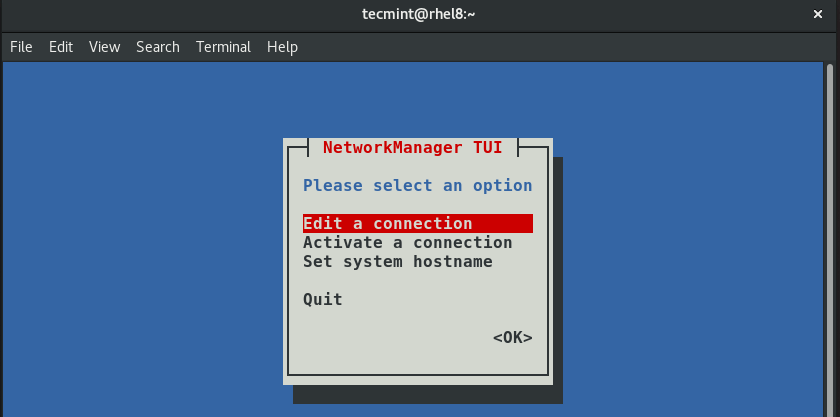
An alternative for the nmcli is the nmtui, short for Network Manager Text User Interface. The nmtui is yet another handy tool that allows you to easily configure your network interfaces using a graphical display by invoking the nmtui command straight from the terminal or even PuTTY.
To configure a network interface IPv4 address, begin by invoking the nmtui tool:
nmtui
Select the first option, ‘Edit a connection’, and hit ENTER.
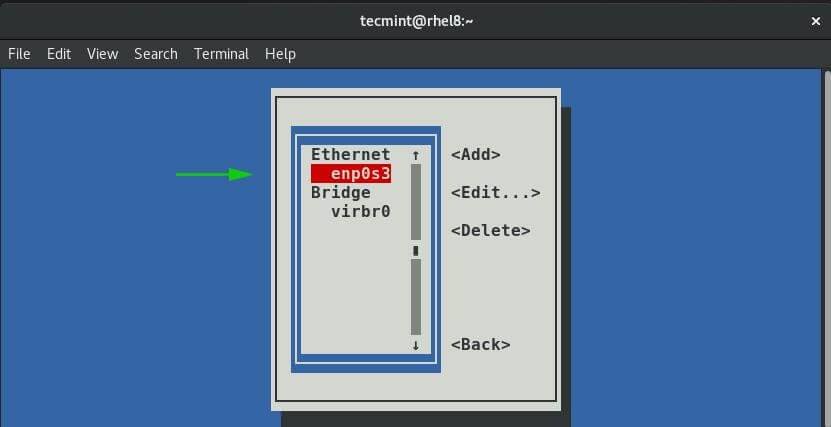
Next, select the interface you want to configure and hit ENTER. In this case, the interface we are configuring is enps03.
In the next step, key in the preferred IP address and define the subnet mask, default gateway, and DNS servers as shown below.
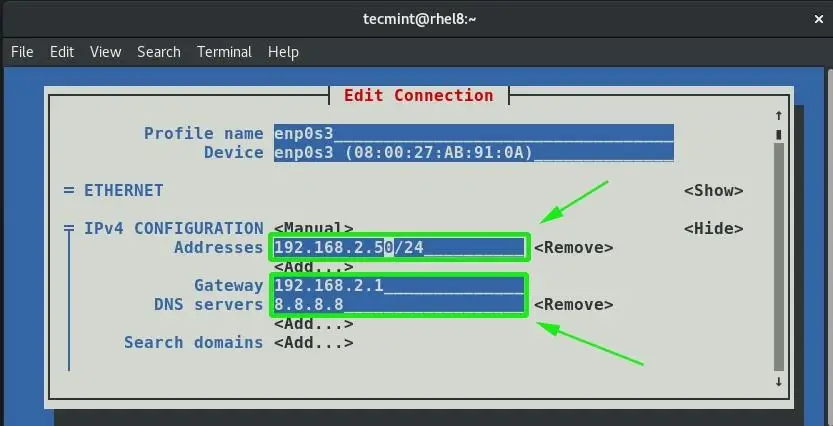
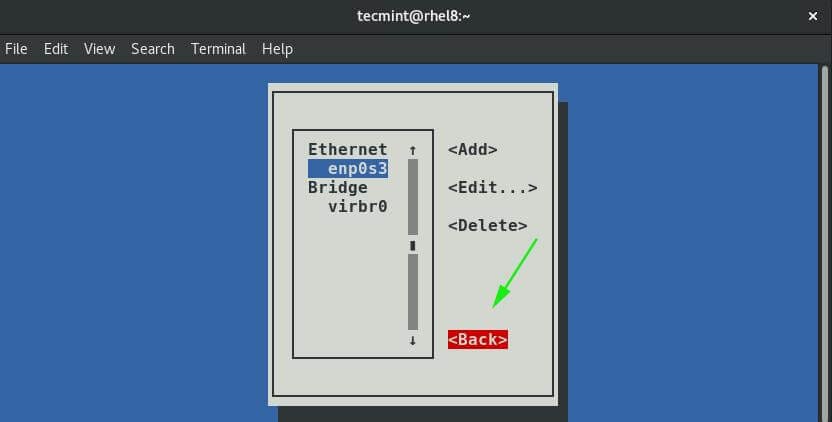
Once you are satisfied with your settings, scroll all the way down and hit ENTER on the ‘OK’ option.

This takes you back to the interface screen as shown below. Navigate and hit the ‘Back’ option.
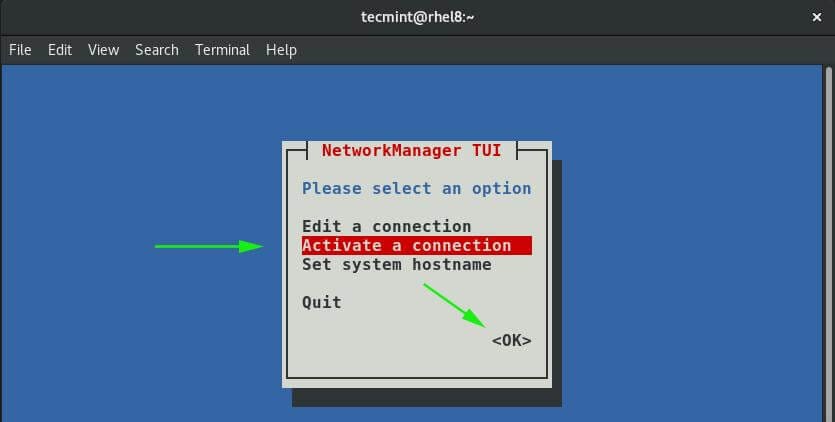
Select ‘Activate a connection’ and then ‘OK’ and hit ENTER.
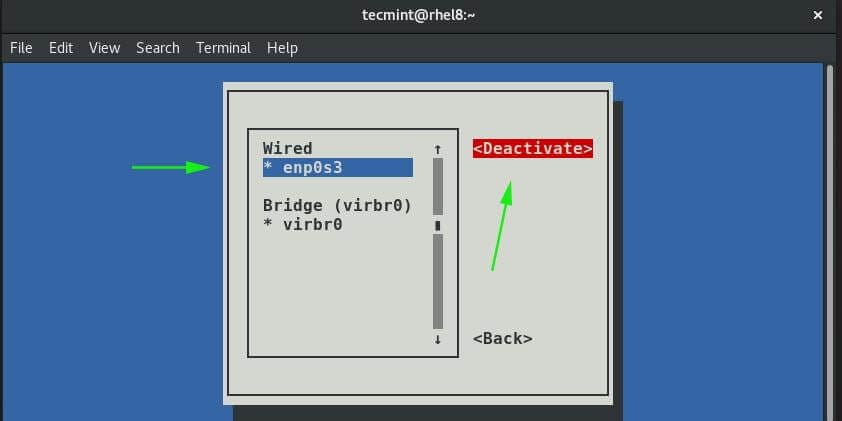
Select your interface name and then navigate to the ‘Deactivate’ option and hit ENTER.
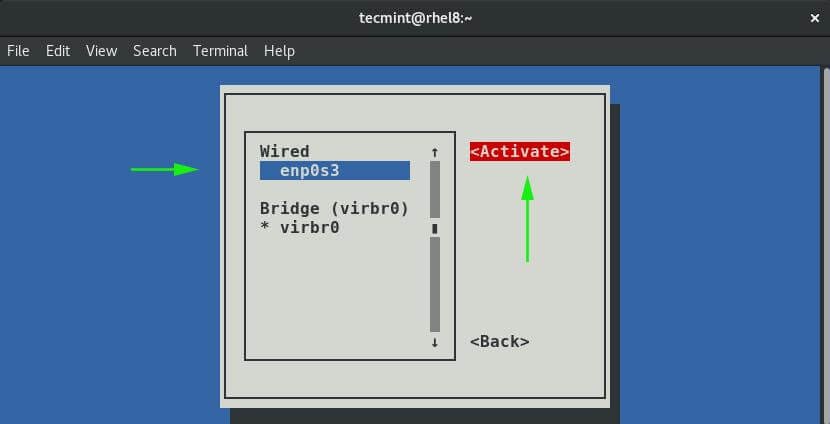
This will take you a step back, whereupon you will click on the ‘Activate’ option as shown:
We’re all done now. To go back, click on the ‘Back’ option and finally, press ENTER on the ‘Quit’ selection.