Chapter #6: Understanding the Boot Process and Process Management
In this chapter, we explore the Linux boot process in RHEL, and walk through process management with systemctl, ps, renice, and kill commands.
We will start this chapter with an overall and brief revision of what happens from the moment you press the Power button to turn on your RHEL server until you are presented with the login screen in a command line interface.
Please note that 1) the same basic principles apply, with perhaps minor modifications, to other Linux distributions as well, and 2) the following description is not intended to represent an exhaustive explanation of the boot process, but only the fundamentals.
The Linux Boot Process
Before diving in, keep in mind that while the boot process may vary slightly depending on BIOS/UEFI, MBR/GPT, or boot loader versions (GRUB2, LILO, etc.), the steps outlined below apply to a standard modern RHEL setup using GRUB2 and systemd.
- The POST (Power On Self Test) initializes and performs hardware checks.
- When the POST finishes, the system control is passed to the first stage boot loader, which is stored on either the boot sector of one of the hard disks (for older systems using BIOS and MBR), or a dedicated (U)EFI partition.
- The first stage boot loader then loads the second stage boot loader, most usually GRUB (GRand Unified Boot Loader), which resides inside
/boot, which in turn loads the kernel and the initial RAM–based file system (also known as initramfs, which contains programs and binary files that perform the necessary actions needed to ultimately mount the actual root filesystem).
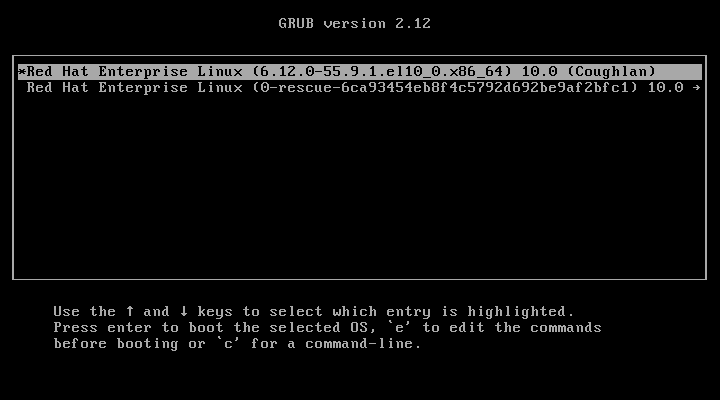
🔎 Note: If you experience boot issues, the kernel parameters passed via GRUB at this stage can be temporarily modified for debugging by pressing e on the selected kernel entry in the splash screen.- We are presented with a splash screen that allows us to choose an operating system and kernel to boot (see Fig. 1):
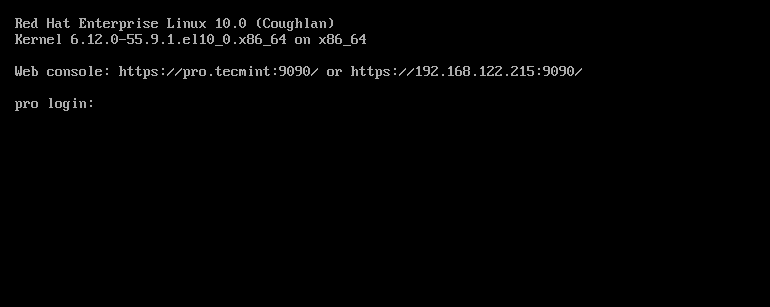
- The kernel sets up the hardware attached to the system, and once the root filesystem has been mounted, it launches a process with PID 1, which in turn will initialize other processes and present us with a login prompt.
Ctrl + Alt + F3 to access TTY3, or change the default target with systemctl set-default multi-user.target.Once the system boots, it's useful to inspect which processes are running and understand how they relate to systemd as the root of the process tree.
Note that if we wish to do so at a later time, we can examine the specifics of this process using the dmesg command and filtering its output using the tools that we have explained in previous chapters of this series (see Fig. 3):
ps -o ppid,pid,uname,comm --ppid=1
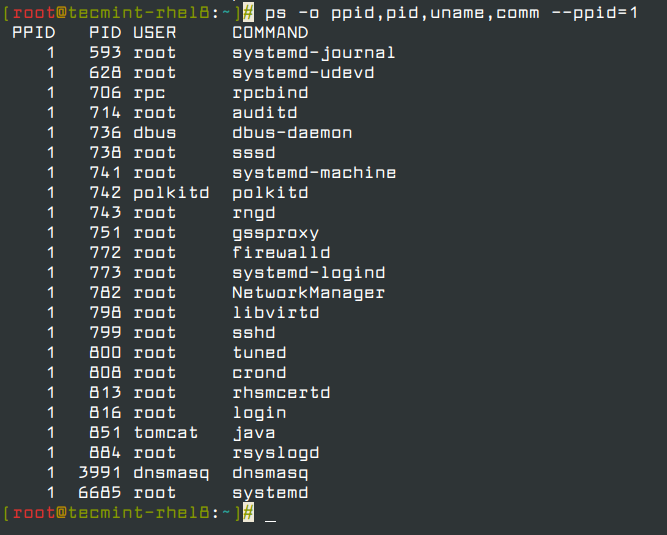
In the example above, we used the well-known ps command to display a list of current processes whose parent process (or in other words, the process that started them) is systemd (the system and service manager that most modern Linux distributions have switched to) during system startup.
Remember that the -o flag (short for --format) allows you to present the output of ps in a customized format to suit your needs, using the keywords specified in the STANDARD FORMAT SPECIFIERS section in man ps.
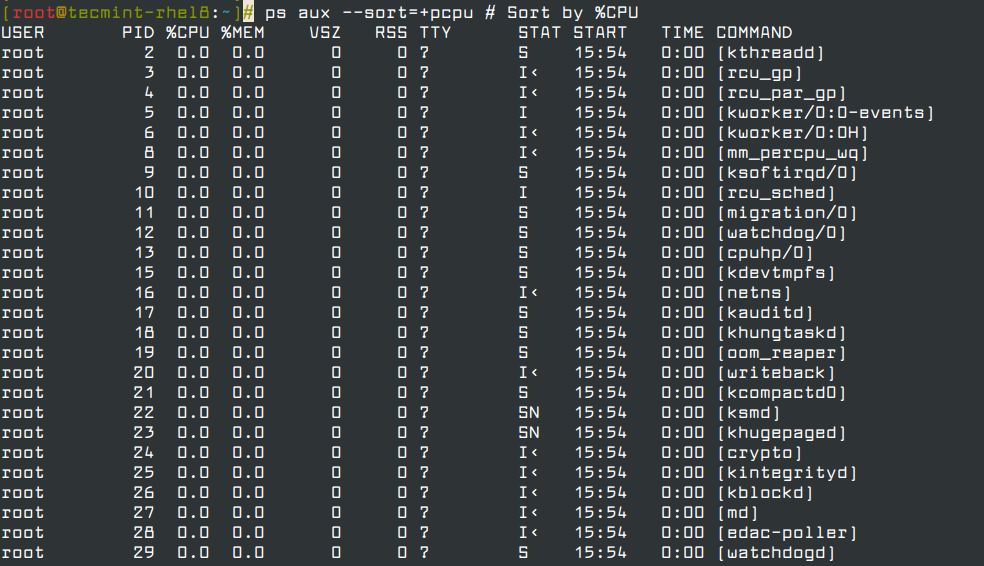
Another case in which you will want to define the output of ps instead of going with the default is when you need to find processes that are causing a significant CPU and/or memory load, and sort them accordingly (see Fig. 4 for an example):
ps aux --sort=+pcpu     # Sort by %CPU (ascending)
ps aux --sort=-pcpu     # Sort by %CPU (descending)
ps aux --sort=+pmem     # Sort by %MEM (ascending)
ps aux --sort=-pmem     # Sort by %MEM (descending)
ps aux --sort=+pcpu,-pmem # Combine sort by %CPU (ascending) and %MEM (descending)