Chapter #1: How to Use Linux Shell Commands and Find System Help
In this article, we will explain how to enter and execute commands with the correct syntax in a shell prompt or terminal, and how to find, inspect, and use system documentation.

In this article, we will explain how to enter and execute commands with the correct syntax in a shell prompt or terminal, and how to find, inspect, and use system documentation.
Interacting with the Shell
If we log into a Linux box using a text-mode login screen, chances are we will be dropped directly into our default shell.
On the other hand, if we log in using a graphical user interface (GUI), we will have to open a shell manually by starting a terminal.
Either way, we will be presented with the user prompt, and we can start typing and executing commands (a command is executed by pressing the Enter key after we have typed it).
Commands are composed of two parts:
- the name of the command itself
- arguments
Certain arguments, called options (usually preceded by a hyphen), alter the behaviour of the command in a particular way, while other arguments specify the objects upon which the command operates.
The type command (see Fig. 1) can help us identify whether another certain command is built into the shell or if it is provided by a separate package.
The need to make this distinction lies in the place where we will find more information about the command.
For shell built-ins, we need to look in the shell’s man page, whereas for other binaries we can refer to their own man page.
type cd
type top
type type
type less
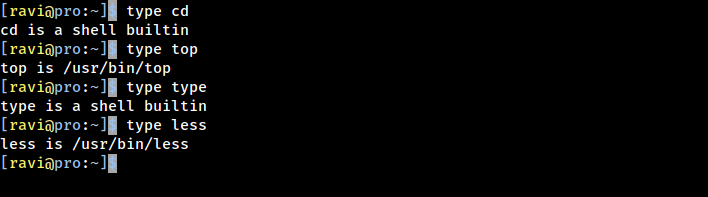
In the examples above, cd and type are shell built-ins, while top and less are binaries external to the shell itself (in this case, the location of the command executable is returned by type).
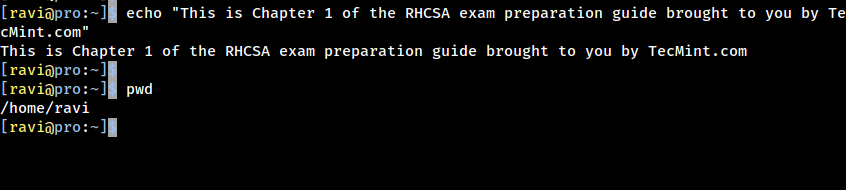
Other well-known shell built-ins include (see Fig. 2):
echo- Displays strings of text.pwd- Prints the current working directory.
echo "This is Chapter 1 of the RHCSA exam preparation guide brought to you by TecMint.com"
pwd
exec- Runs an external program that we specify.
exec command has one special feature: rather than create a new process that runs alongside the shell, the new process replaces the shell, as verified by subsequent.ps -ef | grep [original PID of the shell process]
When the new process terminates, the shell terminates with it. Run exec top and then hit the q key to quit the top. You will notice that the shell session ends when you do.
export- Exports variables to the environment of subsequently executed commands.
export $HISTSIZE
histrory- Displays the command history list with line numbers. A command in the history list can be repeated by typing the command number preceded by an exclamation sign.
For example:
!45
This will re-execute command number 45 from your history list.
If we need to edit a command in the history list before executing it, we can press Ctrl + r and start typing the first letters associated with the command. When we see the command completed automatically, we can edit it as per our current needs.
This list of commands is kept in our home directory in a file called .bash_history. The history facility is a useful resource for reducing the amount of typing, especially when combined with command line editing.
By default, bash stores the last 500 commands you have entered, but this limit can be extended by using the HISTSIZE environment variable (see Fig.3):
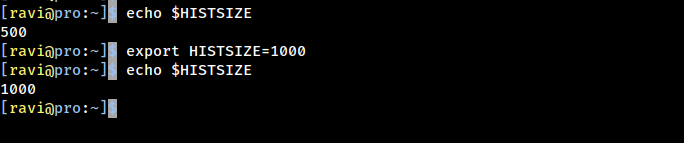
But this change, as performed above, will not be persistent on our next boot. To preserve the change in the HISTSIZE variable, we need to edit the .bashrc file by hand:
# for setting history length see HISTSIZE and HISTFILESIZE in bash(1)
HISTSIZE=1000
Keep in mind that these changes will not take effect until we restart our shell session or run the following command to take the changes on the shell immediately.
source ~/.bashrc
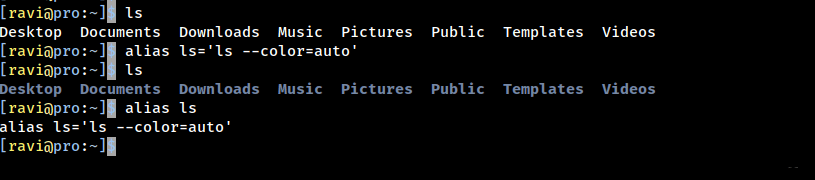
alias- With no arguments, or with the-poption prints the list of aliases in the formalias name=valueon standard output. When arguments are provided, an alias is defined for each name whose value is given.
With an alias, we can make up our own commands or modify existing ones by including desired options.
For example, suppose we want to alias ls to ls --color=auto so that the output will display regular files, directories, symlinks, and so on, in different colors (see Fig. 4):
alias ls='ls --color=auto'
Note that you can assign any name to your “new command” and enclose as many commands as desired between single quotes, but in that case, you need to separate them by semicolons, as follows:
alias myNewCommand='cd /usr/bin; ls; cd; clear'
exit- The exit and logout commands both terminate the shell. The exit command terminates any shell, but the logout command terminates only login shells - that is, those that are launched automatically when you initiate a text-mode login.
If we are ever in doubt as to what a program does, we can refer to its man page, which can be invoked using the man command.
In addition, there are also man pages for important files (inittab, fstab, hosts, to name a few), library functions, shells, devices, and other features.
Examples:
- man uname (print system information, such as kernel name, processor, operating system type, architecture, and so on)
- man inittab (init daemon configuration)
Another important source of information is provided by the info command, which is used to read info documents. These documents often provide more information than the man page.
It is invoked by using the info keyword followed by a command name, such as:
- info ls
- info cut
In addition, the /usr/share/doc directory contains several subdirectories where further documentation can be found. They either contain plain-text files or other friendly formats.
Make sure you make it a habit to use these three methods to look up information for commands. Pay special and careful attention to the syntax of each of them, which is explained in detail in the documentation.